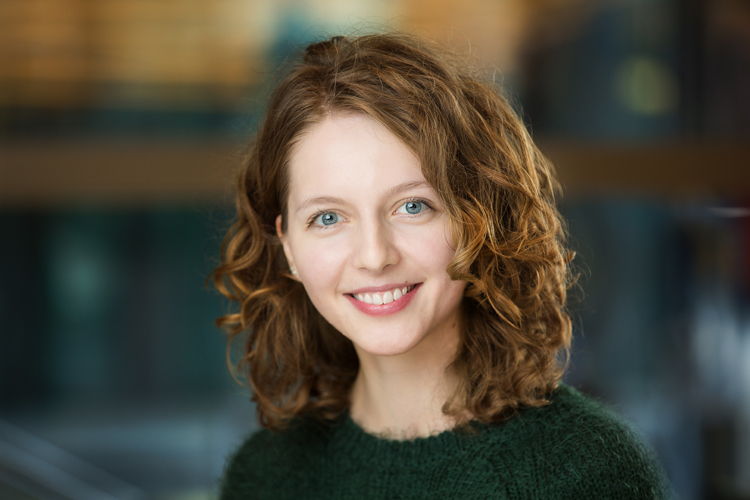
Showing posts with label 10 Tips for Photographing Great Headshots. Show all posts

Saturday, 23 April 2016

4 Steps on How to Read Images and Learn to Replicate the Results

Post By: Daniel Smith
Earlier, I wrote an article called: why asking what camera settings were used may not be as helpful as you think, and in it, I touched on the concept of reading an image.
Learning to read images – from a technical perspective and not a conceptual one – is something that I believe all photographers must be able to do, as it allows you to get a rough guide on what settings may have been used to create an image. They won’t be the exact settings; but you’re most likely not going to have the exact same lighting environment as what a particular photo was taken in.Shallow Apeture 1
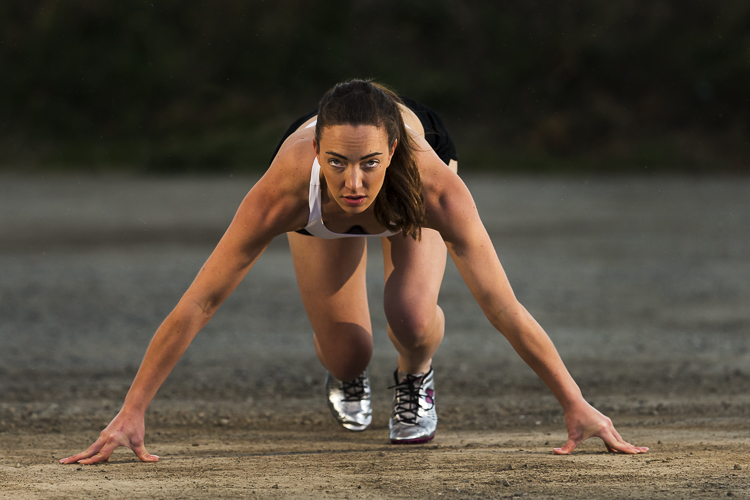
Dive in to read an image

To begin reading images you must have, at the very least, a good understanding of aperture,shutter speed and to a lesser extent, ISO. You’ll want to understand how these things affect the image in different ways. For example, if you saw an image with a lot of motion blur, you would know from your understanding of shutter speed that a slower shutter speed was used.
As you become more proficient with lighting and off-camera flash, you can even read how the subject was lit with artificial lighting, and begin to replicate how it was done. But don’t worry! This article will be focussing on the three major aspects of photography exposure (aperture, shutter speed and ISO) to help you begin your journey to reading images.Slow Shutter 2
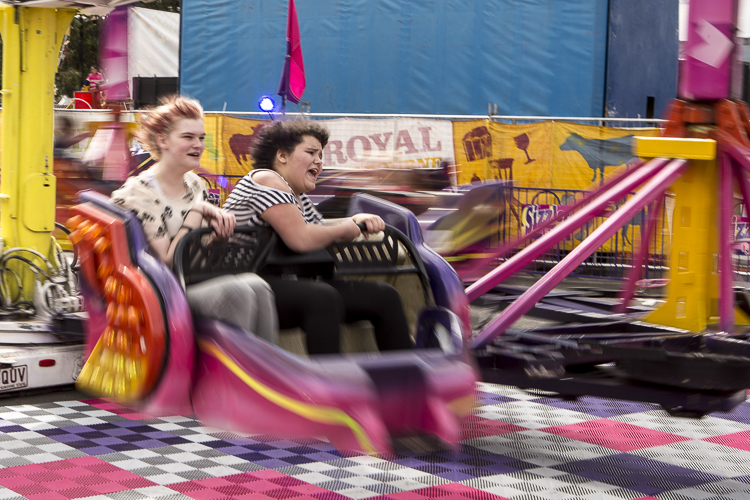
Step 1: Shutter Speed – Fast or Slow?

I find that determining whether a fast or slow shutter speed was used first, can help greatly when it comes to determining aperture and ISO later. The first thing you will want to ask yourself when assessing shutter speed is; was it fast or slow? This can be decided by how much, or how little, motion blur is present in the image, as that is what shutter speed controls.
If everything in the image is pin sharp, and there is absolutely no motion blur at all, then a fast shutter speed would have been used. However, if there is a lot of motion blur, then a slow shutter speed was used.
Here are some points that you can take out of knowing if the shutter speed is fast or slow:
Shutter Speed Table
But how fast is a fast shutter speed, and at what point does the shutter speed become slow? To answer this, think of your shutter speed in relation to your subject’s speed. For example, when photographing sports or other fast action, you may find using a shutter speed of 1/1000th is required to freeze your subjects. This is because your subjects are moving quite fast. However, if you were to photograph people walking down the street, you would not need the same shutter speed, as your subjects are not moving as fast.
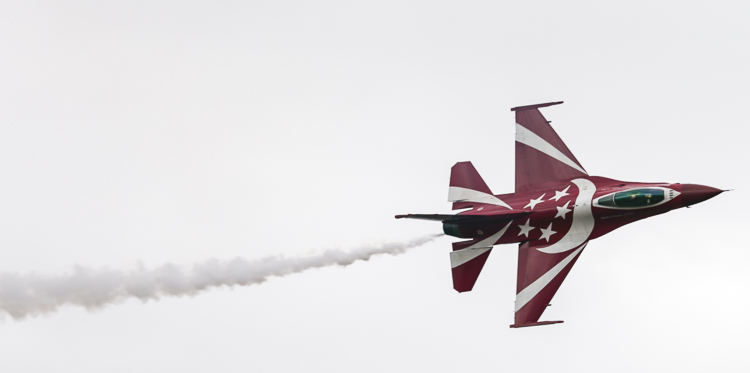
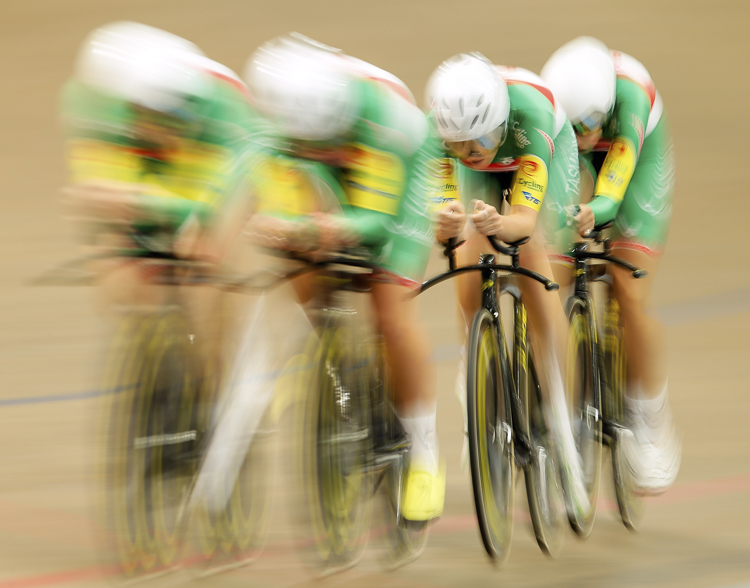
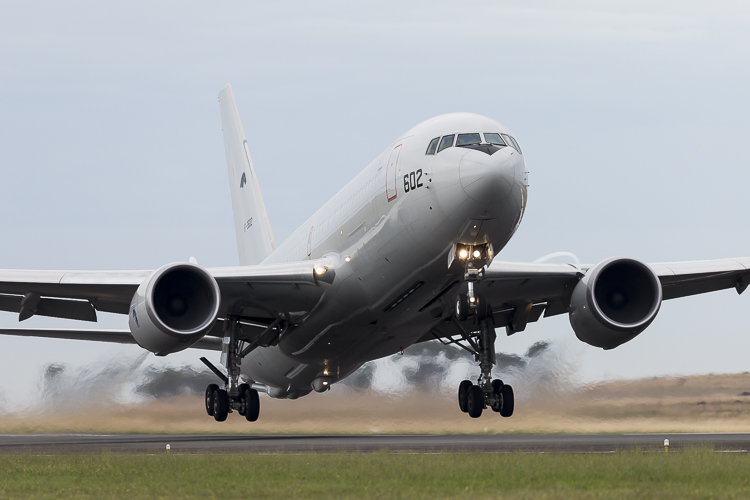
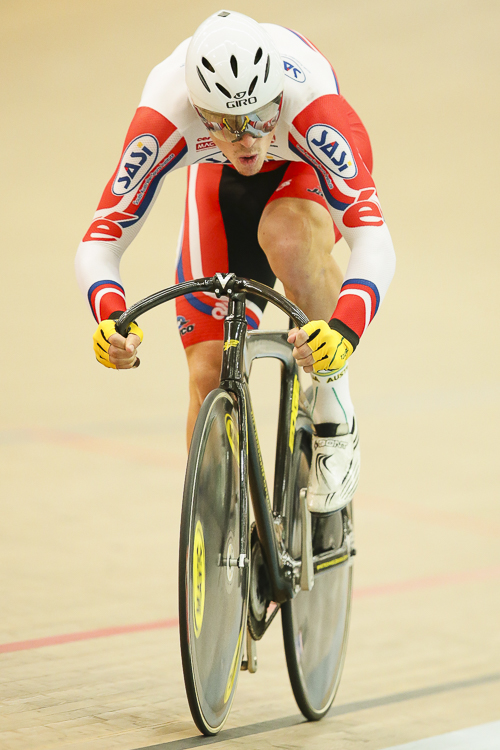
Below are examples of slow and fast shutter speeds. Notice the presence of motion blur in the images where a slower shutter speed was used, but action is frozen with a fast shutter speed. In images that will use a slow shutter speed, it is often recommended you use a tripod to stabilize your camera, and prevent camera shake.
What isn’t important is knowing the exact shutter speed; that is something that you will be able to experiment with to get the results you want. All you are doing here is identifying if a slow or fast shutter speed was used, to give you a starting point.Slow Shutter 3Fast Shutter 2Slow Shutter 4Fast Shutter 1
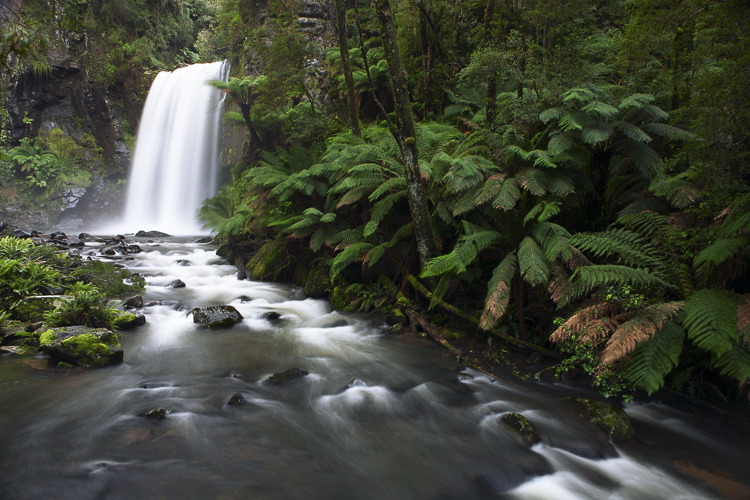
Step 2: Aperture – Large or Small?

Also read:Tips for photographer Doing Fall Portraits


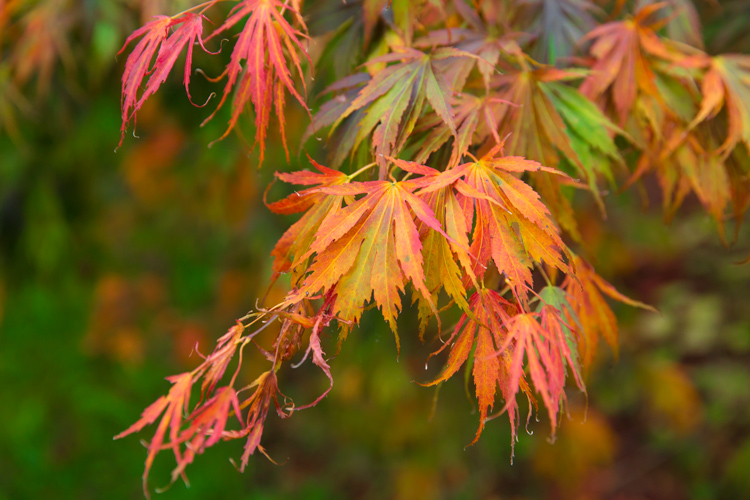
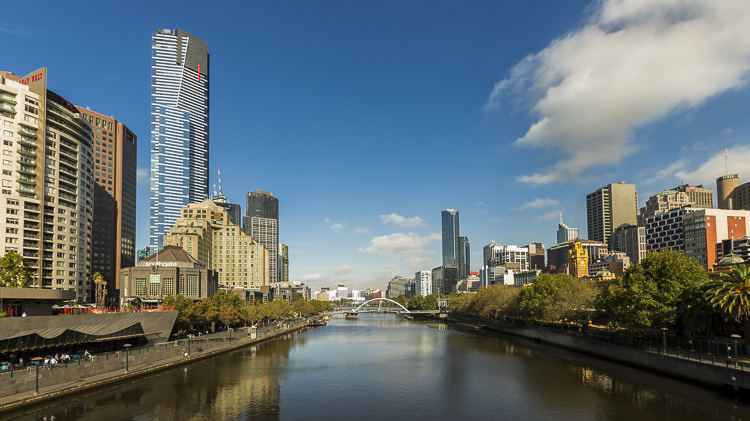
Another way you can determine the aperture is by looking for bokeh, or subject isolation. The more bokeh that is present in the image, the more the subject is isolated. To achieve this, the photographer would use a larger aperture. On the other hand, if everything in the image is in focus, then the photographer employed a smaller aperture to increase their depth of fieldSmall Aperture 1Shallow Aperture 2In step one I mentioned that determining whether a fast or slow shutter speed was used first, can greatly help you in determining the aperture. Here’s why. If you are familiar with the exposure triangle you will know that in nearly all cases when a fast shutter speed is used, it is associated with a large aperture (small f-number). Conversely, the slower the shutter speed, the smaller the aperture becomes. So if you see a photo that has motion blur present, it is highly likely that the photographer used a smaller aperture; or if you see a photo where moving objects are frozen, the photographer has most likely used a larger aperture to enable a faster shutter speed.
Step 3: ISO

Also read: HTC 10 First Look

ISO is one of the parameters that isn’t so important in determining what settings may have been used when reading an image. Use ISO to get the settings that you need to use, to create the shot you want. For example, if you want to use the slowest shutter speed you can, set your camera’s ISO to its lowest setting. Conversely, if you want to use a very fast shutter speed, you may find that you have to increase your ISO.

Step 4: Focal Length

Focal length is something that is often overlooked in images, but it is a very important element indeed. It does more than simply allow a photograph to add more in the frame, or zoom in closer. Different focal lengths evoke different emotions in the viewer when looking at an image. For instance, if a wide angle lens was used, it places the viewer in the scene and can make them feel like they were there; whereas a longer focal length places the viewer further away from the subject, and evokes a more voyeur emotion.
Also read: https://embassydetails.com/consulate-general-of-algeria-in-new-york-united-states
The great thing about focal length is that it is quite easy to distinguish approximately which one was used. To make it simpler, breaking down focal lengths in to three groups can help greatly.
  • Wide: <50mm (i.e. 14-50mm on full frame, 10-35mm on cropped or APS-C sensor)
  • Normal: ~50mm-85mm (35-56mm cropped sensor)
  • Telephoto: 85mm+ (130mm+ on cropped sensor)
You can use the presence of compression to distinguish the different types of focal length. A wide angle lens accentuates the foreground and increases distances in the frame, as well as having a very wide field of view. This effect increases as the focal length decreases – or gets wider. On the other end, a telephoto lens will give you much more compression, and make distances in the frame look shorter. Their field of view will decrease, and the affects of aperture, particularly larger apertures, will be more pronounced. That’s why f/2.8 at 16mm looks different than f/2.8 at 200mm, if your subject is kept the same size in the frame.
Here is a small table with examples of the same scene photographed from the same point, but with different focal lengths.
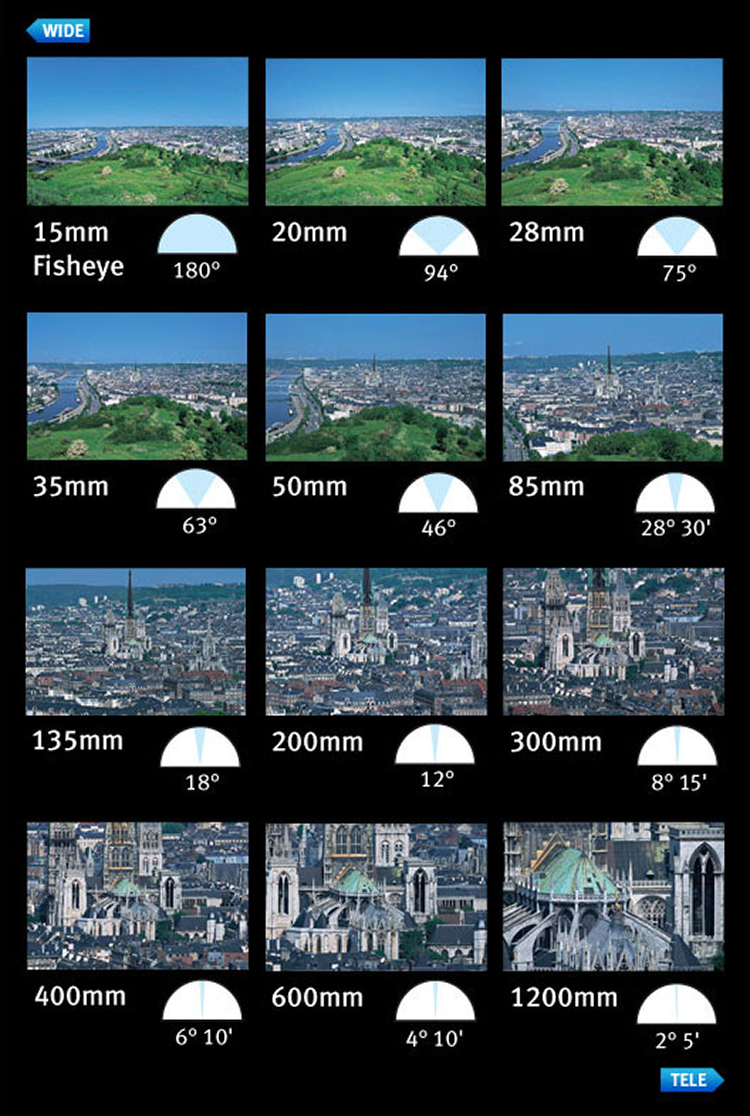
Image courtesy of Canon
Now you have had a quick introduction on how to read images. Remember, knowing the exact settings is not important, but knowing how to get an approximate guess is better than not knowing anything at all! With experience, you will become more proficient at reading images, and will be able to guess with more precision. The more you understand aperture, shutter speed, and ISO, the better you will be at reading images.
Along the way, you will also learn that different genres within photography use a different set of settings. For example, most landscape photographers will use smaller apertures, lower ISOs, and slower shutter speeds; whereas sports shooters for instance, will generally use higher ISOs, larger apertures, and faster shutter speeds.
Daniel Smith is originally from Melbourne, Australia, but now resides in the UK. He specializes in sport and editorial photography and is a photographer with Getty Images. You can see more of his work at Carbon Photographics, and by following him on Instagram.

Friday, 11 March 2016

Tips for photographer Doing Fall Portraits

written by: Sean Gannon 
Autumn provides photographers with an abundance of colours and amazing light. When captured right, autumn can create images which are the envy of everyone.
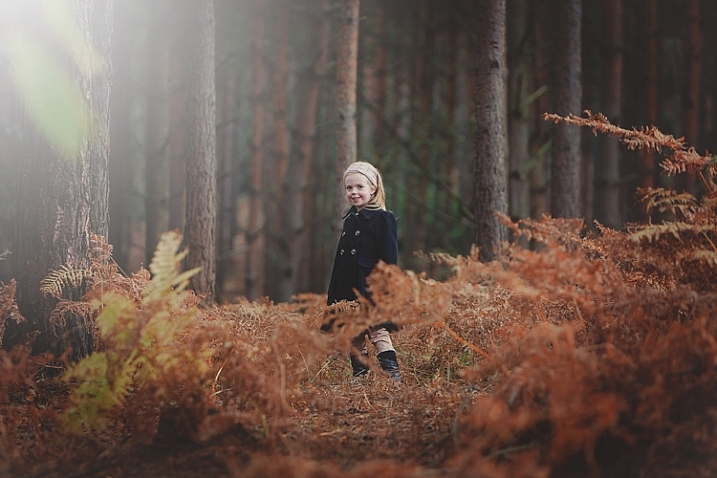
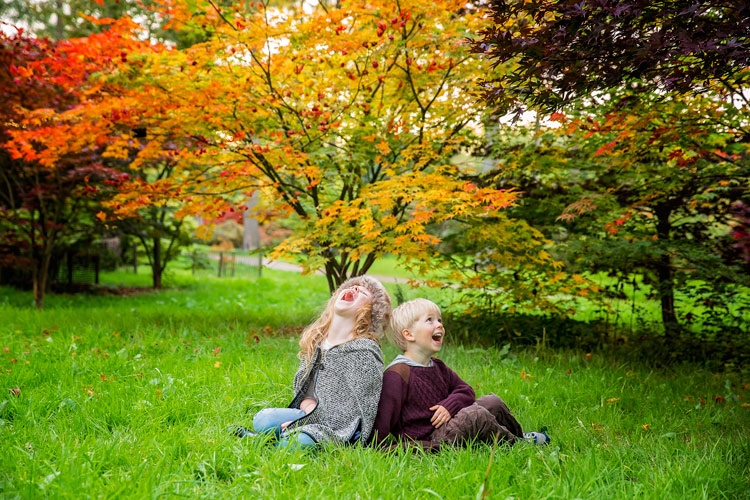
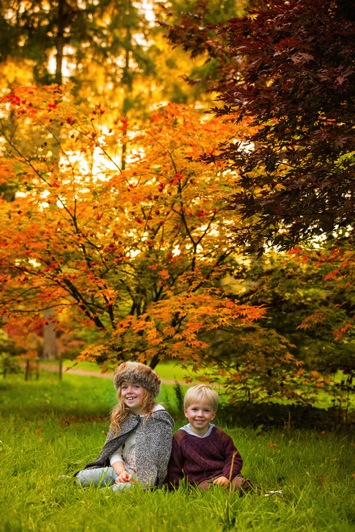
For family photos, autumn can provide you with amazing backdrops, and a variety that can be matched by no other season. For this article, I took my own two children for a walk in the woods to do some fall portraits. Photographing other people’s children is always easier than your own, so I thought it would be a great exercise, and we may also even get some nice pictures of our own children for once. So here are some fall portrait tips to get you started.
Gannon-Studios-2
Autumn Portraits 4

Preparation

Preparation is the key to any successful shoot. Of course ensuring your camera equipment is charged, you have clear cards, and your gear is clean seems like a no brainer, but it’s often the fundamentals that we overlook. Clearing cards can be daunting for those starting out, but just double check that you have downloaded everything, then use the Format function (in the camera) that will give you a completely clear card. There are rumors that deleting single images in-camera can lead to corrupting the card, so it’s best to use the Format function.
Make sure you check the weather. Here in the UK, as well as many other parts of the world, it can change quickly at this time of year. Check with a few sources about local weather. It’s such a pain to get everyone together, get in the car and travel for some time, only to be rained out. Although, even rain in autumn can provide some great image opportunities, if you are dressed correctly.
Gannon-Studios-1
Sunrise and sunset can give us the best light. However, dragging your family out of bed for a photo shoot is always going to be tough. Aim to start your shoot about an hour before sunset.This Golden Hour is favored by many professional portrait photographers, as the light is more flattering and you may even get a great sunset. You can look up sunset times for your local area. It can be surprising how early it gets dark, and you want at least a good hour of shooting before the sun goes down.
Make sure everyone dresses appropriately. It’s getting colder, and it’s one less thing to worry about if everyone is warm during the walk back to the car. While we still think it’s lovely and warm outside, believe me, it gets cold pretty quick when the sun starts to go down. Also have a change of clothing available for everyone. It can be wet and muddy and some of us are prone to falling over!
Make sure you bring snacks and drinks. Especially if you are photographing children. They will get bored and hungry way before you do, so anything to help keep them going while you master that perfect shot the better.
Editor’s note: if you are photographing other people’s kids have the parents bring snacks that the kids like. Never give food to other people’s kids without asking the parents, there may be allergies or special diets.

Clothing advice for portrait photographers:

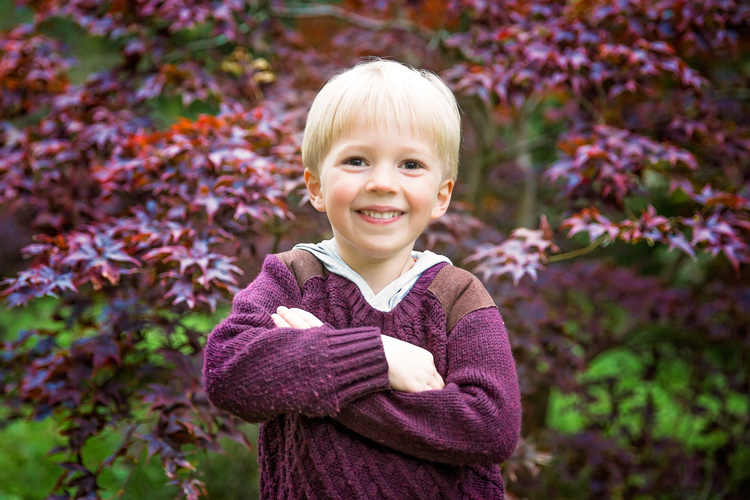
Clothing choices are always important for portraits, but in fall it can really make a difference to your image. Try and have everyone wear natural tones that will either compliment the colours of the leaves and trees, or blend in. My son wore a dark red sweater, as we knew the area had very vivid reds in the trees. My daughter wore black and white which is a timeless combination that blends in well. My son also wore a grey hood that coordinated with his sister.
Autumn Portraits
Try and avoid clashing patterns or colours amongst your subjects by discussing it in advance, and maybe come up with a colour theme that everyone can include. Also avoid t-shirts or sweatshirts that have dominant logos. If he could, our son would have Star Wars logos on everything. This can of course date an image, and is also very distracting.
Try and have a few changes of clothes available. This will not only provide variety in your images, but in the wet and possibly muddy conditions, you may well need them, especially for any children.

Location

Location is essential for any shoot, but for autumn you want to find the best colours and textures you can. Things can change really quickly. The leaves can change over a couple of days, but it often doesn’t happen until later than you think. For this article, we actually struggled to find autumn colours despite it being early October. You also need to check that the leaves are still there. A heavy wind can take them down overnight, so don’t wait too long after you have scouted your spot to shoot.
We searched online for arboretums, these are great places that have collections of interesting trees. Of course, your local forest would be great too.
Autumn Portraits 2
Use social media for location tags to see what other people have photographed over the last few days, at or near the same location. Instagram, Twitter and even Trip Advisor are fantastic for this. You may also get to see a great place that you may not have found otherwise.

The technical bits

For my shoot, I was using a Canon 5D Mark 3 and took the 24-70mm f/2.8 Mark 2, and the 70-200mm f/2.8 Mark 2. These of course are professional cameras and lenses, but any modern camera whether a DSLR, point and shoot, or even a smart phone should provide great images. In fact, I find the iPhone 6 has great range of colours and light.
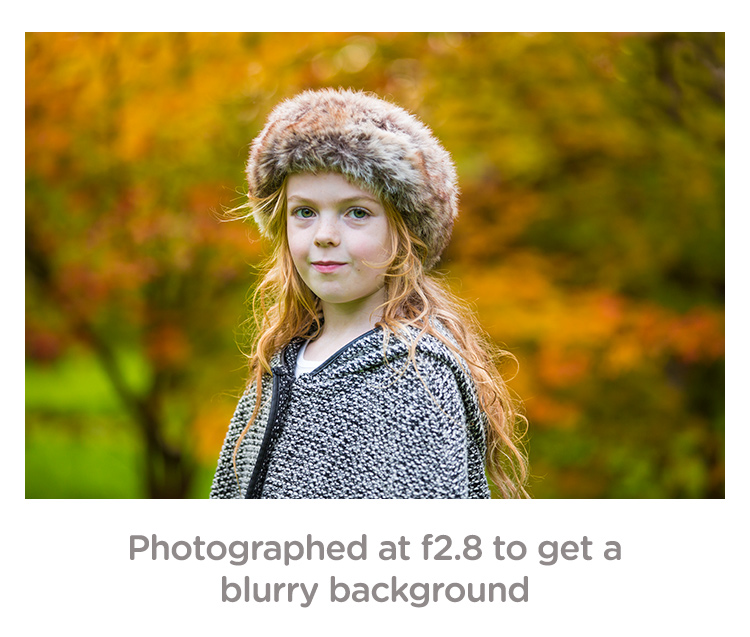
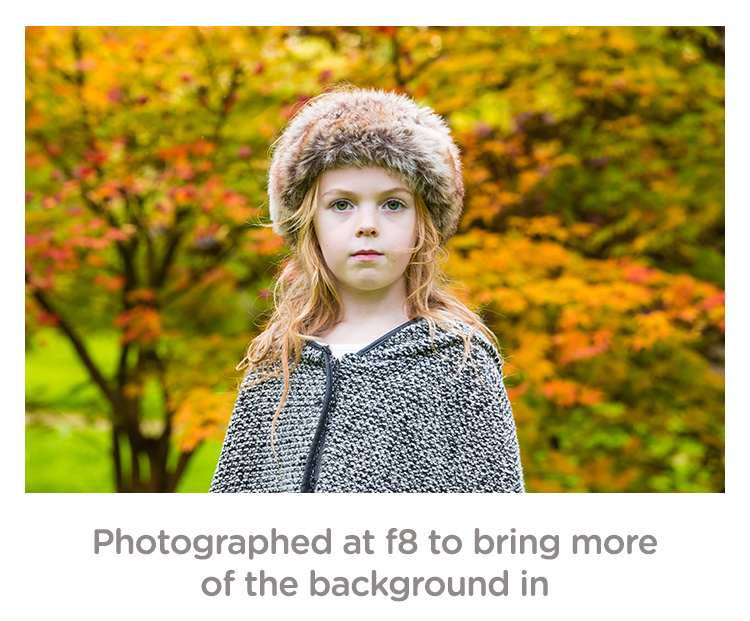
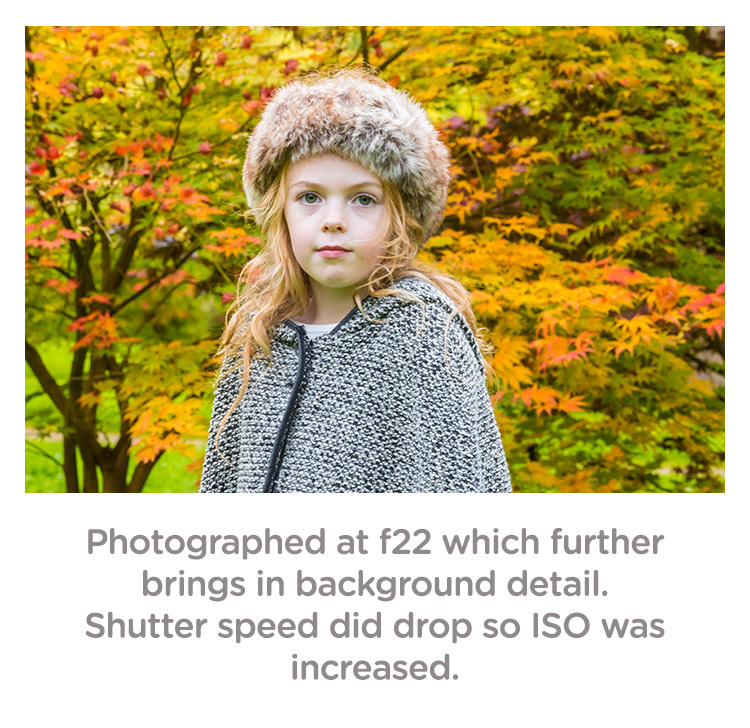
If you are using a DSLR, you can really play with the aperture (f-stops) to get a range of looks without moving location. To get a super blurry background, set your aperture to the lowest number. On my lens, this is f/2.8. Some lenses can go lower and some are limited to higher setting. Even with a kit lens that comes with your camera, you should be able to get to around f/5. If you want the leaves and your family in focus, try increasing the aperture to f/8 or even f/22. Do be careful though because at f/22 your shutter speed will be significantly slower, and you may well need to increase your ISO to compensate.
Depth of field guide f2 8
Depth of field guide f8
Depth of field guide f22


I photographed the images above in Aperture Priority (AV on a Canon, and A on a Nikon). This is when you decide the aperture and the camera sets the shutter speed. Keep an eye that the shutter speed doesn’t geet too slow (1/60 as a minimum). If it does, increase your ISO.
Personally, I always shoot in RAW. For me it just allows me that flexibility afterwards. However, with modern cameras, JPEGs are very versatile, and don’t break up as much as they used to. Some cameras allow you to capture a RAW and JPEG at the same time. This is great so you have the RAW to go to if need be.
White Balance: for these images, I shot in cloudy White Balance. It warmed up the colours, although I did alter these in Camera RAW processing later, it did give me a great starting point. If you are using your manufacturer’s own software, you should be able to change the white balance quite easily.

Getting natural smiles and reactions from children

You know your own children very well. You know the songs they like and what gets them interested. However, they are also very comfortable around you, and may decide to walk off just as you get your camera settings right. Here are a few tips to get a natural reaction.
As in the images in this article. I asked my children to laugh hysterically for no reason at all. This got a huge overreaction which although is a great animated image, is not what we were after. What did happen is that as they calmed down from that, they had natural smiles. They thought it was funny and continued smiling naturally.
Posing Idea 1
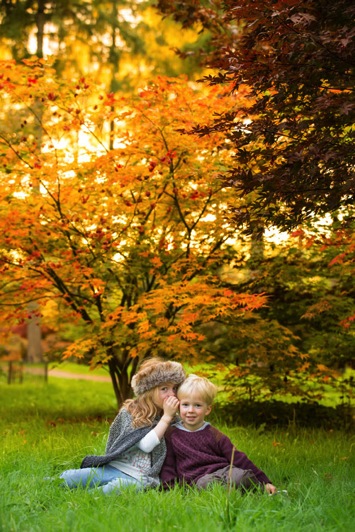
If you have more than one child, ask one to tell the other a secret. This will always get them giggling.
Posing Idea 2Posing Idea 3
With just one child, ask them to tell you or the camera anything that they are interested in. Our son will talk for hours about anything Star Wars or Marvel. With our daughter we can ask her math questions, which gets a range of reactions.
Sing them a song but get it wrong. For some reason, this is the funniest thing ever to kids. Basically, do anything to distract them or get a reaction, but not by saying CHEESE!

Editing your images

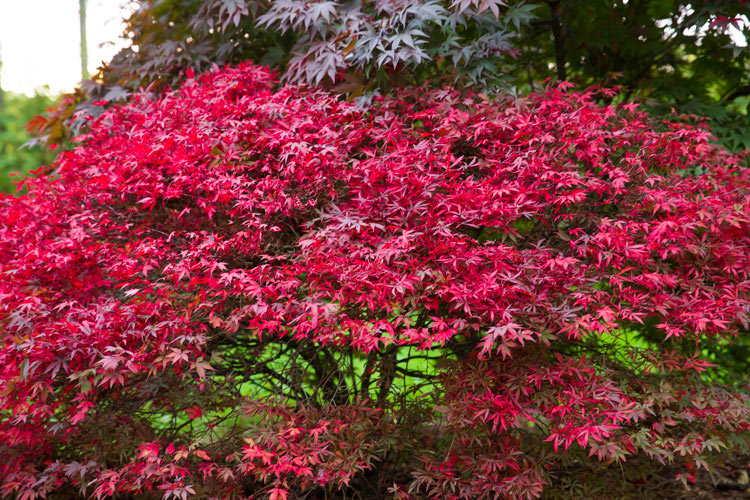
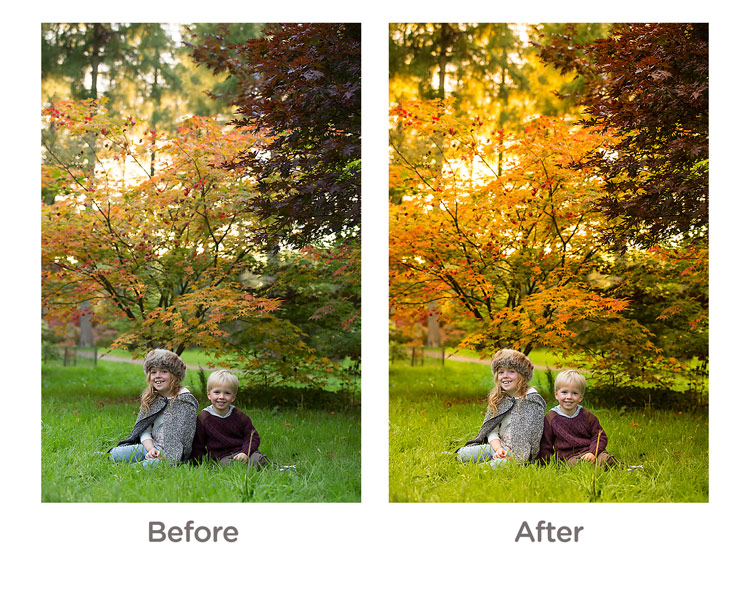
For editing, I used Camera RAW processor which is part of Photoshop. However, most cameras come with editing software, or you can use something like Lightroom which is quite affordable. I actually kept the editing quite simple. The main thing I did was to go to the saturation panel and increased my Reds, Greens and Yellows. This really brought some punch to the image.
Before and After Editing

And finally…

Please print your images in some way. As parents, we are great at taking images, but not doing anything with them. Don’t worry about capturing the most amazing image, just get something that captures your family and print it some way.
Sean Gannon 
 which specialises in corporate headshot photography across the UK. He works with large corporate clients, photographs hundreds of colleagues, and works with professional individuals, to create headshots for use in print, as well as their own websites, and of course social media such as LinkedIn and Twitter. With national coverage, Headshots UK have a network of photographers to capture business portraits wherever their clients are based.

Wednesday, 9 March 2016

10 Tips for Photographing Great Headshots

A Post By: Sean Gannon
Photographing a headshot can seem like a daunting prospect. To have one person in front of your camera, looking to you for direction and positivity, is an intense environment. People are generally very critical of themselves in photographs, and feel very nervous. However, there are some simple things that you can do to make it a lot easier for everyone.
Headshot on Black Background 1
Here are 10 tips to help you photograph headshots:

1. Have a pre-session consultation

Before your session make sure you know how the images will be used and what style they would like. This can be on the phone or face to face. Talking to them, will help them relax so much more than email. This will allow you to help them prepare for the session. Make sure they know what to expect, and are as relaxed as possible.
Headshot on White Background 1
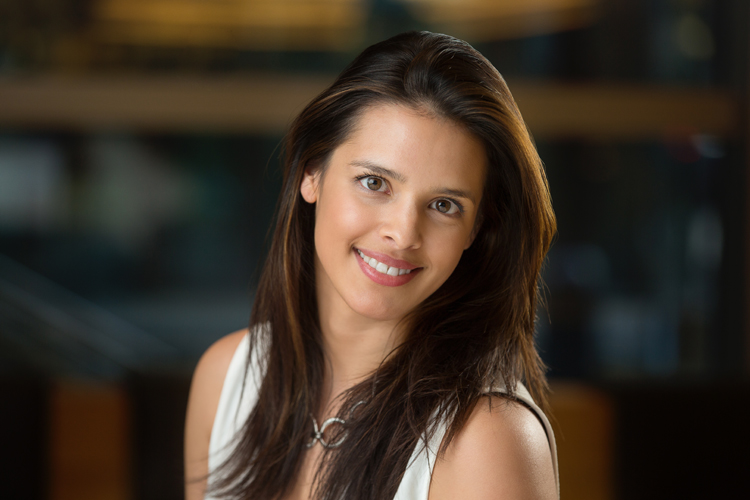
Find out about what profession your subject is involved in; a corporate lawyer may well opt for a clean white background look (above), while a more relaxed style of business (yoga instructor) may prefer a more colourful, environmental image (below). Find out in the consultation what they want so you are prepared on the day.
Indoor Headshot

2. Help them to choose the right clothes

Generally speaking, solid, neutral colours, work best for headshots, as you want to avoid anything that distracts away from people’s faces. If it is a formal style you are looking to achieve, make sure that everyone gets the message, and remembers to bring formal work clothes with them. Men often forget their jackets, so for a consistent look, try and have a spare one on hand, even if you need to clip it at the back. If you have time with a person, get them to bring a few items of clothing. Remind them to iron their clothes as well.
Here are some example of good clothing choices:
What to wear
What to wear 2
What to wear 3

3. Create separation from the background

Make sure that your subject doesn’t stand too close to the background. If you are using a studio background (or wall in an office) and you stand someone close to it, you may see shadows on the wall, which makes the images look less professional. For environmental headshots outdoors, I still recommend separation from the background. The bokeh creates a nice nondescript background, especially when shot at a wide aperture. Typically I aim for an aperture of f/4 for environmental and natural light sessions, and f/8 for studio style sessions with lights.

4. Starting the session

Whether you are photographing headshots for a single person, or a whole team, make sure you have a general chat with each person first, to help them relax. This can be just a 10 second, confident handshake, and a “how are you?”. People generally feel very tense about having their photograph taken, and talking about something in their comfort zone (where they live, if they have children or pets, etc) will really help them appear and be more comfortable.

5. Silly Faces!

A great way of helping people to relax in front of the camera, if you don’t have much time with them, is to ask them to pull a funny face for the first frame. Use this as a lighting test for a new person as well. This is great at breaking the ice, and very few refuse to do it. Once they have pulled a daft face, everything else is easy!
Funny faces
Headshot Photography London 0997

6. Lighting and positioning

For business and actors’ headshots, I tend to light quite evenly. There are a few circumstances when the images are low-key, but for the main part, they are evenly lit. A classic beauty lighting setup works well, with one light above, and a second light, or a reflector filling from below.
I ensure the subject is turned with their body 45 degrees away from the camera, and towards the main light source (if your lighting allows for this). Their face should be straight towards the camera. You may need to guide people to look straight down the lens. It’s surprising how many people look off camera, at the flash, or somewhere random.
Headshot setup
Posing example

7. Sit people down

People may be more comfortable sitting down, and by asking them to rest their hands on the tops of their thighs, it gives them something to do with their hands. It also ensures that the subjects all know where they need to be, and they don’t move around too much.

8. It’s all about the little adjustments

What separates a great headshot from an average one, are generally very small changes. These little adjustments can make all the difference. The slight tilt to the head, leaning forward, a gentle but intriguing smile. Don’t be afraid to ask someone to make very specific changes to their expression and position, until you get the image you’re looking for.
Headshot Photography London 1052

9. Keep talking and be positive

When you’re in the midst of taking photographs, make sure that you keep talking to your subject. Reassure them that they’re doing it right, and you’re getting great images. Even if you’re not satisfied with the images when someone turns their head in a certain direction, or how the light is falling on them, never express that to your subject. Silence will kill the atmosphere, so no matter what is happening, just keep chatting and being positive.

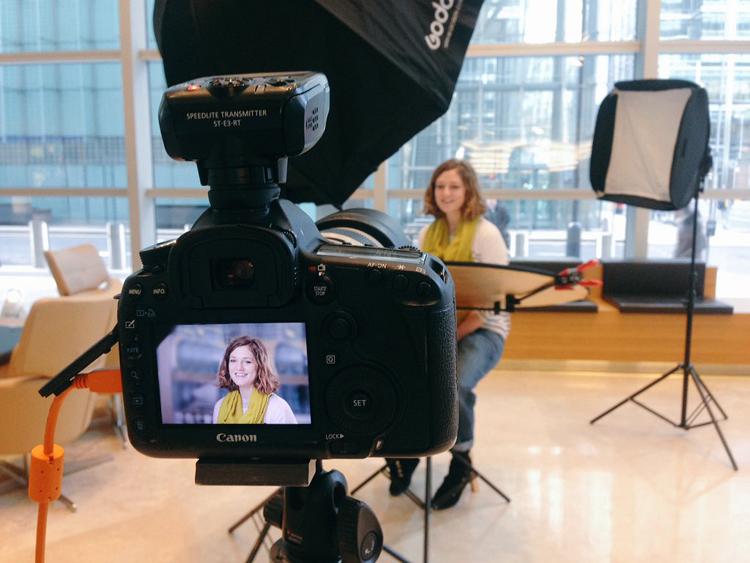
10. Shoot tethered

If you have all the necessary equipment, shooting tethered is a fantastic way the get great headshots. When people see a couple of shots on the screen, they can very quickly get an idea of what needs to be changed. The immediate feedback on the screen will help everyone massively.
I hope you find these tips for better head shots helpful. Do you have any others we missed? Please share them, and your headshot photos in the comments below.


Written by:
Sean Gannon 
which specialises in corporate headshot photography across the UK. He works with large corporate clients, photographs hundreds of colleagues, and works with professional individuals, to create headshots for use in print, as well as their own websites, and of course social media such as LinkedIn and Twitter. With national coverage, Headshots UK have a network of photographers to capture business portraits wherever their clients are based.

already published in 
digital photography school